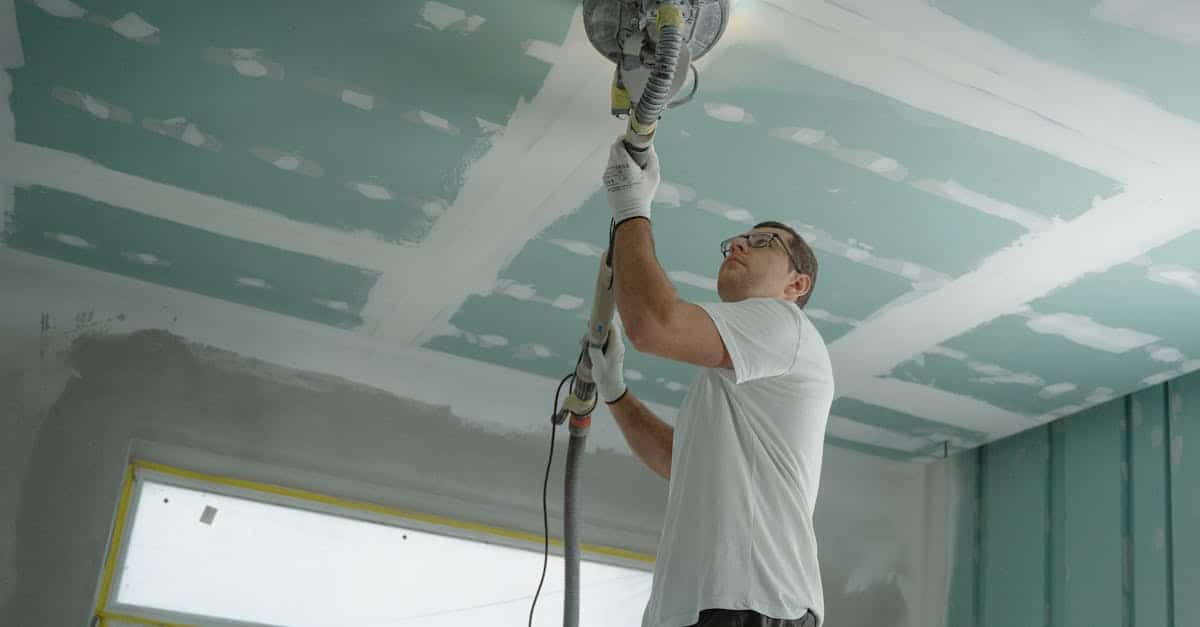
The first step in the concrete polishing process involves preparing the surface. Begin by cleaning the concrete slab thoroughly to remove any dirt, grime, or existing coatings. Use a floor grinder with diamond grinding pads to address any imperfections or uneven areas. Choose the appropriate grit size for the initial grind based on the condition of the concrete. This process creates a smoother surface and opens the pores of the concrete, allowing for better polish adherence.
Once the surface is prepared, progress to concrete polishing with finer diamond pads. Gradually increase the grit size, starting from a lower grit to a higher one, to achieve a glossy finish. Ensure each step is completed before advancing to the next grit. Pay attention to the corners and edges, as these areas can be harder to reach. After polishing, vacuum the dust and residue produced during the grinding process to ensure a clean canvas for the final touches.
To begin the concrete polishing process, ensure the surface is clean and free of debris. Use a broom or vacuum to remove dust and dirt, then wet the floor slightly to prevent dust from becoming airborne. Once the surface is prepared, select the appropriate grind levels based on the condition of the concrete. Start with a coarse diamond grinding pad attached to a floor buffer or grinder, and work your way through progressively finer pads. Each pass should overlap by 50 percent to guarantee an even polish.
After reaching the desired level of shine, it's essential to thoroughly clean the surface again to eliminate any concrete dust. This initial polishing step creates a base for further enhancement. Following cleaning, apply a concrete densifier to strengthen the surface and improve the final finish. Once the densifier has cured, you can begin the final polish using finer pads. This meticulous application of concrete polishing creates a stunning, glossy look that enhances the overall aesthetic of the space.
After completing the grinding and polishing of your concrete surface, it's time to focus on the finishing touches that will enhance both appearance and durability. Begin by thoroughly cleaning the floor to remove any dust or debris left from the polishing process. This step is crucial as it ensures that the sealer will adhere properly. Once the surface is clean and dry, you can choose to apply a concrete polish that best fits your desired finish, whether that be a matte, satin, or glossy look.
Applying a sealer will provide additional protection against stains and wear, significantly prolonging the life of your polished concrete. There are several types of sealers available, including penetrating and topical options, each offering unique benefits. Carefully follow the manufacturer’s instructions for application to achieve the best results. Consider adding enhancements such as dyes or stains to introduce color or a glossy topcoat for extra sheen. These final steps in the concrete polishing process will ensure a professional-looking finish that you can be proud of.
After completing the concrete polishing process, applying a sealer is essential for protecting the surface. Sealers create a barrier that guards against stains and enhances the overall appearance of the concrete. Depending on the desired finish, you can choose between penetrating sealers and topical sealers. Penetrating sealers absorb into the concrete and provide a natural look, while topical sealers form a protective layer on the surface.
Adding enhancements can further elevate the visual appeal of polished concrete. Options include applying dyes or stains for color variation, or using aggregates to create unique textures. Ensure that any enhancements are compatible with the sealer you select to maintain the integrity of the polished surface. Proper application techniques will help achieve a uniform look and ensure that the enhancements last over time.
One common mistake in concrete polishing is failing to adequately prepare the surface before beginning the process. If the concrete is not cleaned thoroughly, dirt and debris can create uneven spots that hinder the polishing results. Additionally, neglecting to repair cracks or chips in the concrete can lead to complications during polishing, as these imperfections will be magnified once the surface is shiny. Proper preparation is essential to achieving a smooth and uniform finish.
Another frequent error arises from using the wrong grit level on polishing pads. Starting with too fine a grit can prevent the removal of surface imperfections, while using too coarse a grit can lead to scratches that are difficult to eliminate in later stages. It’s important to follow a systematic progression of grits to ensure that each layer of imperfections is addressed effectively. Skipping steps or rushing this part of the concrete polishing process can ultimately lead to unsatisfactory results.
When undertaking concrete polishing, many DIY enthusiasts overlook the importance of surface preparation. A clean and properly prepared surface is crucial for achieving a smooth finish. Failing to address cracks, stains, or uneven areas can lead to undesirable results. Improper preparation often results in an uneven polish that highlights imperfections rather than conceals them. This not only affects aesthetics but can also impact the durability of the surface.
Another common mistake is neglecting to use the appropriate equipment and techniques. Concrete polishing requires specific tools, including grinding pads and polishing machines, matched to the job's requirements. Using inadequate or improper tools can slow down the process and lead to subpar results. Additionally, beginners might not understand the correct speed and pressure settings needed while polishing, further complicating the task. Without experience, these errors can transform a DIY project into an unsatisfactory outcome.
Yes, you can polish concrete yourself if you have the right tools, materials, and a good understanding of the process. With proper preparation and care, DIY concrete polishing is achievable.
To polish concrete, you will typically need a concrete grinder or polisher, diamond polishing pads, a vacuum for dust control, a wet/dry mop, and safety gear like goggles and dust masks.
The time it takes to polish concrete depends on the size of the area and your experience. Generally, it can take anywhere from a few hours to a couple of days.
Common mistakes include not properly preparing the surface, using the wrong grit pads, rushing the process, and neglecting to apply sealers or enhancements after polishing.
To maintain polished concrete floors, regularly sweep and mop to remove dust and debris, use a pH-neutral cleaner, and reapply a sealer as needed to keep the surface looking fresh and protected.
612 Painter St, Media, PA 19063
https://hoffmanconcretecontractors.com/
+16106386380
WJ82+88 Media, Pennsylvania
Open 24 hours
461 Rugby Rd, Birdsboro, PA 19508
https://hoffmanconcretecontractors.com/reading-pa/
+14849981139
Open 24 hours

Copyright © Hoffman Concrete Contractors - Media. All Rights Reserved